
Seven years. That’s how long I went without growing a single vegetable at this house.
It wasn’t for lack of wanting to. I had a thriving container garden at our old house and genuinely missed having fresh-from-the-garden produce. The problem? Two words: THE DEER. We back up to woods, and the local wildlife had zero respect for my gardening ambitions. So I did nothing. For seven years.
Then last Mother’s Day, my family gifted me a raised metal garden bed. And somewhere between assembling it, spending an entire weekend filling it, watching my first zucchini grow from a tiny seedling to a plant so enormous it practically needed its own zip code — something clicked. I fell completely, embarrassingly, head-over-heels in love with gardening again.
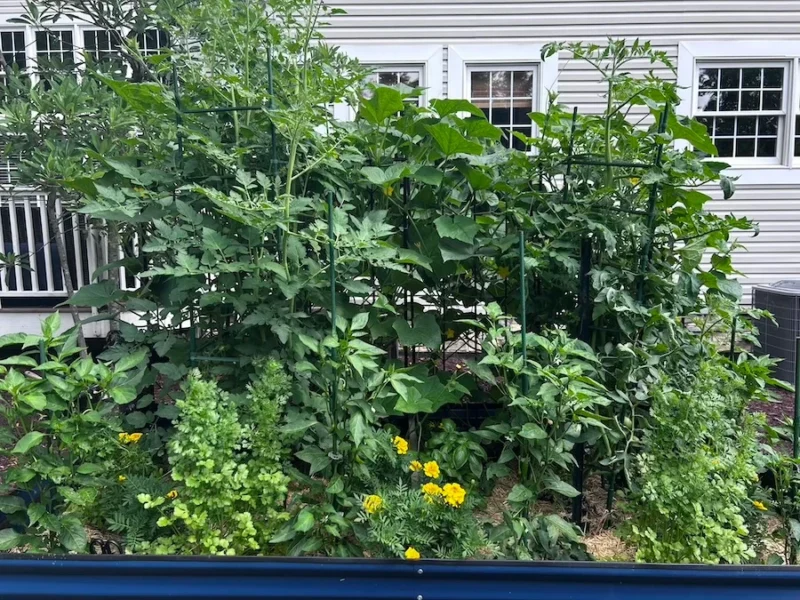
And then I fell down the rabbit hole.
This post is about that rabbit hole — and the garden planner I built because of it.
The Metal Raised Garden Bed That Started It All
I specifically asked for a metal raised bed because I’d been burned too many times by wood.
Warping, fading, deteriorating after a couple of seasons — no thank you.
When I stumbled across this metal raised garden bed, I was sold immediately. It comes in NAVY BLUE. My signature color. Obviously it was meant to be.

A few things I love about this bed after a full year of use:
- Tool-free assembly — I assembled it in about an hour, by myself
- Powder-coated steel with zero signs of wear, fading, or rust after a full year outdoors
- 2 feet deep (holds up to 478 gallons of soil!) — plenty of room for deep-rooting veggies
- Non-toxic materials — important when you’re growing food
- Three stabilizing rods keep it completely sturdy under the weight of all that soil
How I Filled My Raised Garden Bed Without Spending a Fortune
Here’s the thing nobody warns you about: filling an 8x4x2-foot raised bed with straight bagged soil would have cost me $350–$500. Hard pass.
Instead, I used the Hügelkultur method — a German composting technique that fills the bottom two-thirds of your bed with layered organic materials (cardboard, sticks, dead leaves, grass clippings, straw) before topping it off with quality soil. The organic layers break down slowly, retain moisture, and ultimately enriches the soil over time.
And since I have access to many of these materials in the adjacent woods, most of my fill materials were literally free:
My layers, bottom to top (wet each one down before adding the next):
- Cardboard — (aka recycled Amazon boxes) wet thoroughly, acts as a weed barrier
- Sticks and branches — collected from the woods behind our house
- Dead leaves — also sourced from the woods
- Grass clippings — untreated, sourced from our own yard
- Fine cut straw — $33
- Raised garden bed mix — $200
Total fill cost: ~$233, versus $350–$500 for straight soil. The whole process took my husband and me an entire weekend — it’s not a quick Saturday project — but it was so satisfying to complete.
One thing I’ve added this summer that I wish I’d known about from the start: edible straw mulch on top of the soil. With the heat we’ve been having, it’s been a game changer for retaining moisture between waterings.
Growing Season 1: What I Grew & How I Grew It
Because deer are my nemesis, I did my research and planted things they tend to avoid — and it worked. Not a single deer incident all season. Take that, Bambi.
Last year’s big wins? Zucchini and cucumbers, both firsts for me, and both went absolutely feral in the best possible way.
I installed a set of chevron garden trellises across the back of the bed for the cucumbers to climb. Watching those vines take over was the highlight of my summer.
For the tomatoes, I used buildable garden cages that stack and configure to whatever height and shape your plants need — much sturdier than those flimsy cone-shaped ones that always tip over. (The tomatoes themselves? Total flop, but our whole region had a rough tomato year, so I blamed the weather and am trying again this year).
Growing Season Two: Down the Gardening Rabbit Hole
Fast forward to this summer — my second season with the raised bed — and things have…escalated. What started as a casual return to gardening has become a full-blown obsession.
It began innocently enough: I joined a couple of Facebook groups focused on raised garden bed gardening. And the Meta algorithm figured out my new obsession and started feeding me an absolutely relentless stream of gardening content.
Master gardener Reels.
Gardening product ads.
The daily soap opera of “what is WRONG with my cucumber plant?!” posts in the Facebook group, where literally hundreds of people show up to offer their very confident, sometimes wildly contradicting opinions.
I was hooked.
I started learning about companion planting — which plants thrive together and which ones are basically sworn enemies. I got sucked into soil chemistry. I started recognizing common garden pests on sight (a skill no one asked for but here we are). I learned about plant diseases, watering schedules, fertilizing timing, and the concept of “days to maturity” that I had definitely been ignoring.
And then I discovered that my daily habit of going outside every single morning to inspect every square inch of my 32-square-foot garden plot is, apparently, completely normal behavior among serious gardeners.
The more I learned, the more I realized I needed a system.
I was craving a tool that could hold ALL of this information — my plant library, my garden bed layout, my care schedule, my harvest notes, my seed inventory, A place to journal about my trial-and-error methods. Something that would make me a better gardener and keep me organized throughout the whole growing season.
So I built it – with a spreadsheet (learn why spreadsheets are one of my favorite organizing tools).
The Complete Garden Planner: A Google Sheets Garden Planner Spreadsheet That Does It All
The Complete Garden Planner is a 15-tab Google Sheets file designed to take you from seed selection all the way through harvest — with everything organized in one connected spreadsheet that actually talks to itself.
It’s the tool I wished had existed when I was first setting up my raised bed.
Here’s what’s inside:
A Live Garden Tracker Dashboard
Your garden command center. The live dashboard displays an up-to-date view of:
- how many plants you’re growing
- harvest yield
- what needs water today
- overdue tasks,
- total money invested, and so much more — all updating automatically as you log data.
Today’s to-do list and upcoming harvests are right there front and center every time you open the planner.
A Plant Library with 100+ Pre-Loaded Plants
Over 100 common vegetables, herbs, and fruits come pre-loaded with difficulty ratings, planting months, soil and watering needs, and — my favorite feature — Good Neighbors and Bad Neighbors columns. These power the companion planting tools throughout the whole planner.
A Visual Garden Bed Planner with Clash Detection
Plan up to three garden beds visually. Assign plants to slots, and if you accidentally put two bad-neighbor plants next to each other? That cell turns coral to flag the conflict. No more accidentally planting enemies side by side.
Companion Planting Made Automatic
A quick-reference grid showing green (good pair), red (known clash), and gray (neutral) for all your library plants. It’s like a cheat sheet for companion planting — the thing I wish I’d had when I started.
A Planting Log with Auto-Calculated Harvest Dates
Log each plant with its planted date and growth stage (seed → germinating → growing → flowering → fruiting → harvesting → done). Days in Ground, Expected Harvest Date, and Days to Harvest all calculate automatically.
A Plant Care Schedule That Tracks Itself
Set up your watering, fertilizing, weeding, and pruning tasks with their frequency. Double-click Last Done when you complete a task, and Next Due and Status recalculate automatically. Overdue tasks flow straight to the dashboard so nothing falls through the cracks.
A Seed Inventory Spreadsheet That Flags Expired Packets
Track every seed packet you own: source, purchase date, expiration date, germination rate, days to maturity. Status auto-flags packets as Fresh, Expiring, or Expired so you’re never planting dead seeds.
Harvest Tracker + Expense Log + Garden Journal Pages
Log every harvest with date, quantity, quality score, and where it went (kitchen, canning, snacking…). Track your garden spending with live category totals. Keep dated field notes organized by category — observations, pest sightings, successes, weather, experiments. Your four most recent journal entries appear right on the dashboard.
A Monthly Planting Calendar Customized for Your Zone
A year-round reference for what to start indoors, direct sow, transplant, harvest, prune, and fertilize each month — customizable for your growing zone. The dashboard automatically pulls up the current month’s plan.
Ready to Get Your Garden Organized?
Whether you’re in your first season with a brand-new raised bed or you’re a seasoned gardener who’s been keeping notes in a random notebook for years — the Complete Garden Planner will help you grow more intentionally, track what’s actually working, and show up every morning to your garden with a plan.
Explore More Organizing and Planning Tools
- Printables for Organizing Home & Life: The Ultimate Organizing Printables Vault
- Organize with Binders: Managing Household Papers & Projects
- How to Use AI to Get Organized
- Clipboard Wall Organization For Papers
- Learn How to Organize Photos with This Epic Tool
- Review of Container Store’s Elfa Storage Systems
- Using Wallpaper Organizers to Organize Your Computer Desktop
- Freedom Filer: The Answer To Your Filing System Woes
- Planning Tools & Systems: Foundations of an Organized Home
- Creating a Home Command Center
- Creating a Household Drop Zone